


Plastic color is the first thing a customer notices and the last thing a moulding plant can fix after the fact. A shade that drifts between shipments looks like a quality failure even when every dimension is perfect, and a batch that matches under factory light but diverges in daylight creates a complaint nobody can reproduce. Control comes from measurement, not from an experienced eye.
Table of Contents
- Why plastic color drifts
- 1. Set the target as a number
- 2. Measure with the right instrument
- 3. Agree a Delta E tolerance
- 4. Control the masterbatch
- 5. Freeze the moulding window
- 6. Match texture and gloss
- 7. Verify in production, not only at approval
- Metamerism and light sources
- Approval workflow for a new tool
- Lighting on the shop floor
- Handling a colour complaint
- Documentation
- Cost, supply and storage
- Pre-production checklist
- Frequently asked questions
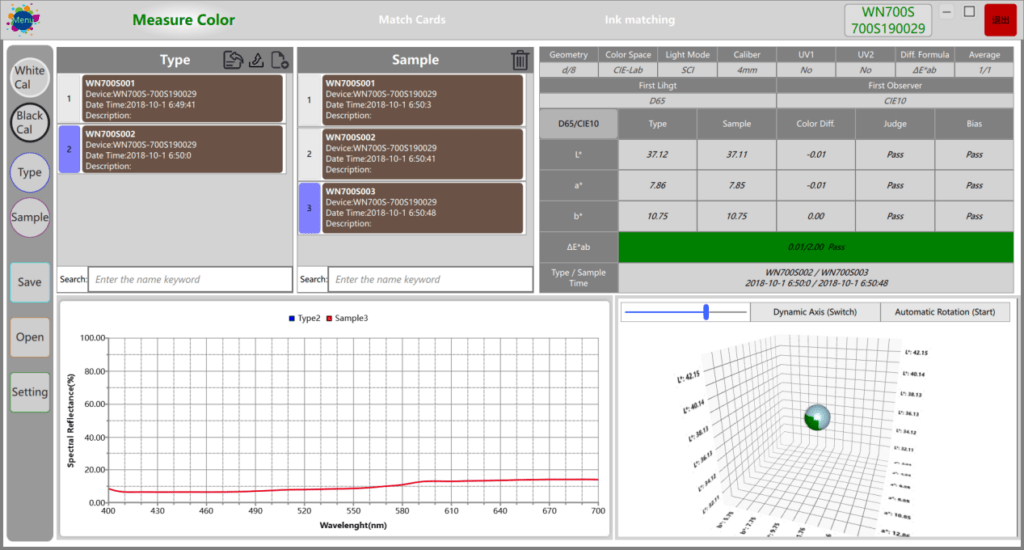
The practical summary: plastic color control requires a numeric standard, a calibrated instrument, a defined light source, a tolerance agreed in Delta E units, and a process window that does not move. Remove any one of those and the remaining four become opinions.
Why Plastic Color Drifts
Color in a moulded part comes from pigment dispersed in a polymer, and the perceived shade depends on the pigment, the dispersion, the base resin, the thermal history, and the surface. Each of those can move independently, which is why a shade problem is rarely solved by adding pigment.
Heat is the most common cause. Overheated melt degrades organic pigments and yellows the resin, so a part moulded at the top of the window looks different from one moulded at the bottom. Residence time has the same effect, which is why a small shot in a large barrel drifts darker through a shift.
Shear adds another variable. High shear at a small gate can orient pigment flakes or break dye crystals, producing flow lines and a directional shade difference. Glass fibre makes it worse, because the fibres orient and change the way light reflects.
Finally, the base resin itself varies. A different lot of the same grade can arrive with a slightly different natural colour, and a masterbatch letdown that was adequate for the previous lot will be visibly wrong for the next one.
Ambient conditions complete the list. Humidity affects some hygroscopic resins before moulding, and drying that is skipped or doubled changes both the surface and the shade. A dryer monitored only by a timer is not monitored at all.
1. Set the Target as a Number
A physical chip is a starting point, not a specification. The target should be a set of colorimetric values measured on a defined instrument, under a defined illuminant, on a defined surface. That converts “match this sample” into a repeatable instruction.
Record the values in CIELAB, because the coordinates are intuitive: L for lightness, a for red-green, b for yellow-blue. A ΔE value is then the distance between the measured part and the target, and the direction of the error tells the moulder which way to correct.
Keep the approved physical standard as well, stored in the dark and replaced on a schedule. Pigments fade, chips yellow, and a standard that has aged is worse than no standard because it silently redefines the target.
2. Measure With the Right Instrument
A spectrophotometer with a defined aperture and geometry is the minimum. For moulded parts, a 8 degree diffuse geometry with specular included or excluded must be chosen and then kept consistent, because the two settings give different numbers on a glossy surface.
Calibrate against a white tile at the start of each session, and check the instrument against a known green or grey tile at the end. A drifted instrument produces a confident wrong answer, which is more dangerous than no measurement at all.
Measure the same location on the same surface every time. On a textured part, a measurement on a rib and a measurement on a flat face are not comparable, and averaging them hides the difference that the customer will see.
3. Agree a Delta E Tolerance
ΔE is a distance, and the acceptable distance depends on the application. A ΔE of 1.0 is close to the limit of trained visual discrimination; 2.0 is a sensible production tolerance for many consumer parts; 3.0 is visible to most people and acceptable only where parts are not adjacent.
The tolerance should also be directional. A part that is slightly too dark is often acceptable; the same distance in the direction of a hue shift is not. Many specifications therefore combine a ΔE limit with a limit on the individual L, a, and b differences.
Agree the tolerance before the tool is cut, and write it into the drawing or the specification. A tolerance negotiated after a rejected shipment is a negotiation about money, not about colour.
4. Control the Masterbatch
Masterbatch dosing is where most production colour variation begins. The letdown ratio must be set by weight, verified by a gravimetric feeder or a checked volumetric setting, and recorded. A two percent letdown that drifts to 1.8 percent changes the shade measurably.
Masterbatch itself varies between lots. Ask the supplier for the colorimetric values of each lot, and measure an incoming sample against the standard before releasing it to production. A single out-of-tolerance masterbatch lot can consume a week of troubleshooting.
Dispersion matters as much as concentration. Poorly dispersed pigment produces specks, streaks, and a shade that varies across the part. The masterbatch carrier resin should be compatible with the base resin, or the dispersion will fail regardless of the dosing accuracy.
For critical colours, pre-compounded resin is often the better choice. It costs more per kilogram and removes the dosing variable entirely, which is usually the right trade for a visible cosmetic part.
5. Freeze the Moulding Window
Once a plastic color is approved, the process window that produced it becomes part of the specification. Melt temperature, residence time, injection speed, packing pressure, and cooling time all influence shade, and a change in any of them can move ΔE by a visible amount.
Write the window into the setup sheet with upper and lower limits, not a single value. Then verify at the edges: a part moulded at the low end of the melt temperature range should still be within tolerance, or the window is too wide to be useful.
Regrind is a specific risk. Regrind carries a different thermal history, and in coloured parts it often reads darker. Cap the regrind ratio, keep it consistent, and measure the first parts of every run that uses it.
6. Match Texture and Gloss
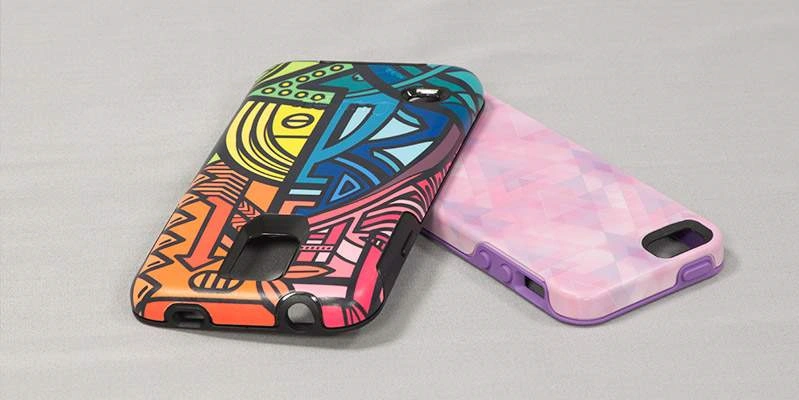
Two parts with identical pigment can look different because of surface. A textured surface scatters light and reads lighter and less saturated than a polished one, and a gloss difference of a few units is enough to fail a visual comparison.
That is why texture and gloss belong in the plastic color specification. The tool texture grade, the gloss level, and the measurement geometry should be recorded alongside the colorimetric values, and any tool repair that changes the texture requires a re-approval.
For assemblies with mixed finishes, such as a textured housing and a polished lens bezel, the two surfaces should be approved together under the same light source. Approving them separately is how mismatched assemblies reach the customer.
7. Verify in Production, Not Only at Approval
Approval is a moment; production is a year. A workable plastic color control plan measures the first part of every lot, records the result, and tracks the trend. A drift that is still inside tolerance is the cheapest possible warning.
Define the sampling: which cavity, which surface, how many parts, and at what interval. For multi-cavity tools, measure more than one cavity, because cavity-to-cavity variation in colour is common and invisible if only cavity one is checked.
Keep the records with the shipment. When a customer reports a shade difference, a trend chart answers the question in minutes and a memory answers it in days. Our guide to quality control in precision injection moulding describes how that record fits into the wider inspection plan.
Metamerism and Light Sources
Metamerism is the condition where two samples match under one light source and differ under another. It happens when the pigment formulations are different even though the colorimetric values agree under a single illuminant.
The defence is to measure under at least two illuminants, typically D65 for daylight and A for incandescent, and to require the match to hold under both. If it does not, the formulation needs adjustment, not the tolerance.
Practical approvals also include a visual check in the light where the product will be used: a shop window, a car interior, or a retail shelf. Instrumental measurement and visual assessment answer different questions, and both belong in the approval.
Colour Approval Workflow for a New Tool
A new tool should not enter production on the strength of one approved part. The approval run defines the master: a fixed process window, a nominated masterbatch lot, and a measured set of colorimetric values that becomes the reference for every later shipment. That master is the anchor for plastic color control, and without it every later comparison is between two unqualified samples.
Run the approval at the centre of the proposed window, then at both edges, and measure all three. If the edges fall outside tolerance the window is too wide, and plastic color will drift the moment production shortens cycle time to hit a target. Narrow the window on paper rather than after the first complaint.
Record the cavity number on every approved sample. Multi-cavity tools rarely deliver identical colour across every cavity, and one approved part from cavity three says nothing about cavity seven. Measure each cavity, and treat a wide spread as a gate or tool problem rather than a plastic color problem.
Lighting on the Shop Floor
Most visual disputes about plastic color happen under light nobody specified. Sodium lamps in a warehouse, mixed daylight and fluorescent in an inspection bay, and a phone torch at a customer site all render shade differently from the D65 illuminant used at approval.
Install a light booth where the approval decision is made and use it for every borderline judgement. A booth with D65 and A sources costs far less than a rejected shipment, and it converts a plastic color argument into a comparison against a stored standard.
Then check the parts where they will actually be seen. A housing judged in a booth and installed in a warm-lit interior is still judged by the user in that interior. Instrumental measurement answers what the part is; the viewing condition answers what the customer sees, and mature plastic color control uses both.
When a Colour Complaint Arrives
Treat a complaint as data. Ask for the part, the shipment date and the light source, then measure the returned part against the retained standard rather than against another production part. Comparing two parts proves they differ; comparing each to the standard proves which one moved.
If the returned part is out of tolerance, work backwards through the record: masterbatch lot, dosing verification, melt temperature, residence time, regrind ratio and cavity. One of those changed, and the process record names it. If the part is inside tolerance, the fault lies in the plastic color specification or in the lighting, and the fix belongs in the approval document rather than on the line.
Close the loop in numbers. A ΔE value plus a light source description settles a dispute faster than any photograph, and it stops the same plastic color complaint from returning with the next shipment.
Documentation That Survives Staff Changes
Colour knowledge leaves with the people who hold it. The defence is a document stating the target values, the instrument and geometry, the illuminants, the tolerance, the approved masterbatch supplier and letdown ratio, and the process window that produced the master.
Keep it where production can reach it. A setup sheet with the plastic color target printed beside the process parameters gets used; a file on a shared drive does not. Revision control matters as well, because a quietly edited target is indistinguishable from a drift.
Review the document whenever anything in the chain changes: a new resin source, a new masterbatch supplier, a tool repair, or an added decoration step. Each is a reason to re-approve, and treating them as paperwork is how a stable plastic color becomes an unstable one.
Cost, Supply and Storage
Colour usually costs more than the quotation suggests. Pre-compounded resin removes the dosing variable but adds cost per kilogram; masterbatch is cheaper but needs a feeder, a verification routine and lot testing. The right choice depends on how visible the part is and how tightly the plastic color is toleranced.
Supply risk deserves a line in the specification. A single pigment source, a single masterbatch supplier or a single compounding plant is a single point of failure, and a forced substitution mid-programme is exactly when shade problems appear. Qualify a second source early, while there is still time to match it properly.
Inventory policy matters too. Masterbatch has a shelf life, pigments settle, and a drum opened six months ago is not the same material as one opened last week. Rotate stock, record lot numbers on the batch card, and retire expired material instead of using it to finish a run.
Ask for the colorimetric values with every shipment, not only at qualification. A supplier who measures each lot gives you a trend; a supplier who measures once gives you a certificate that describes material from last year.
A Pre-Production Checklist
Keep this checklist at the press, not in a folder. A plastic color checklist earns its place only if the setter reads it before the first shot, so it covers the items that actually move ΔE and nothing else.
- Target values recorded in CIELAB, with the instrument, geometry and illuminants named.
- ΔE tolerance written into the drawing, with any directional limits on L, a and b.
- Masterbatch lot measured against the standard before it is released to the line.
- Process window recorded with upper and lower limits, and both edges verified.
- Regrind ratio capped, stated on the setup sheet, and measured when used.
- Texture and gloss grade agreed together with the tool.
- First-off parts of every lot measured and logged by cavity.
Frequently Asked Questions
What Delta E is acceptable for moulded plastic parts?
Between 1.0 and 2.0 for visible cosmetic parts, and up to 3.0 where parts are not compared side by side. The number matters less than agreeing it in advance and measuring consistently.
Why does the same colour look different on two materials?
Base resin colour, surface texture, gloss, and pigment compatibility all differ. A plastic color approved on ABS will not transfer directly to polypropylene without a new match.
Can colour be corrected by adding pigment at the machine?
Only within a narrow range, and only with a documented adjustment. Repeated on-the-fly additions produce a batch that cannot be reproduced and a shade that drifts through the run.
How often should a moulding line be checked for colour?
At the start of every lot, after any parameter change, and then at a fixed interval through the run. Frequency should follow drift risk rather than the calendar.
Does one plastic color specification cover a new supplier?
The specification carries over, but the masterbatch and resin must be measured and re-approved. A different supplier’s dispersion and base colour shift the result, even when the grade name matches.
The Bottom Line
Plastic color control is a measurement discipline, not an artistic one. Fix the target numerically, calibrate the instrument, agree a tolerance, control the masterbatch, freeze the process window, match the texture, and verify in production. The parts will then match, shipment after shipment.
For background, the color difference reference explains the Delta E formulas, and our surface treatment guide covers the decoration processes that sit on top of a matched moulding.